Arduino: Potentiometer Servo Control
This post is about taking two 180 degree Servo motors and controlling them via potentiometers to view the space of 1/2 of a sphere. Here is video of what you will have by the end of the tutorial:
Materials
For this tutorial, you will need the following materials:
- Arduino Uno: or any Arduino with analog input/output pins
- Breadboard
- 2 180 Degree Servo Motors
- 3d Printed Pan Tilt: or any DIY hack to mount the servos. Note: after printing, I had to change a little how I mounted it to work for a 180 degree vertical tilt.
- 2 Potentiometers: my potentiometers come from the Arduino Starter Kit and you can see what they look like in the photos below.
And of course you will need cables, tape/glue/rubber bands for securing the servos.
Servo-Arduino Connection
Depending on which Servo you purchased, the colors of its wires might be different. However, there is a generic mapping of the colors to the Arduino’s standard colors:
- Orange or red on Servo = Red (Power) on Arduino
- Brown or black on Servo = Black (Ground) on Arduino
- Orange/blue/yellow = I/0 Pin control on Arduino
Here is how my connection is done:
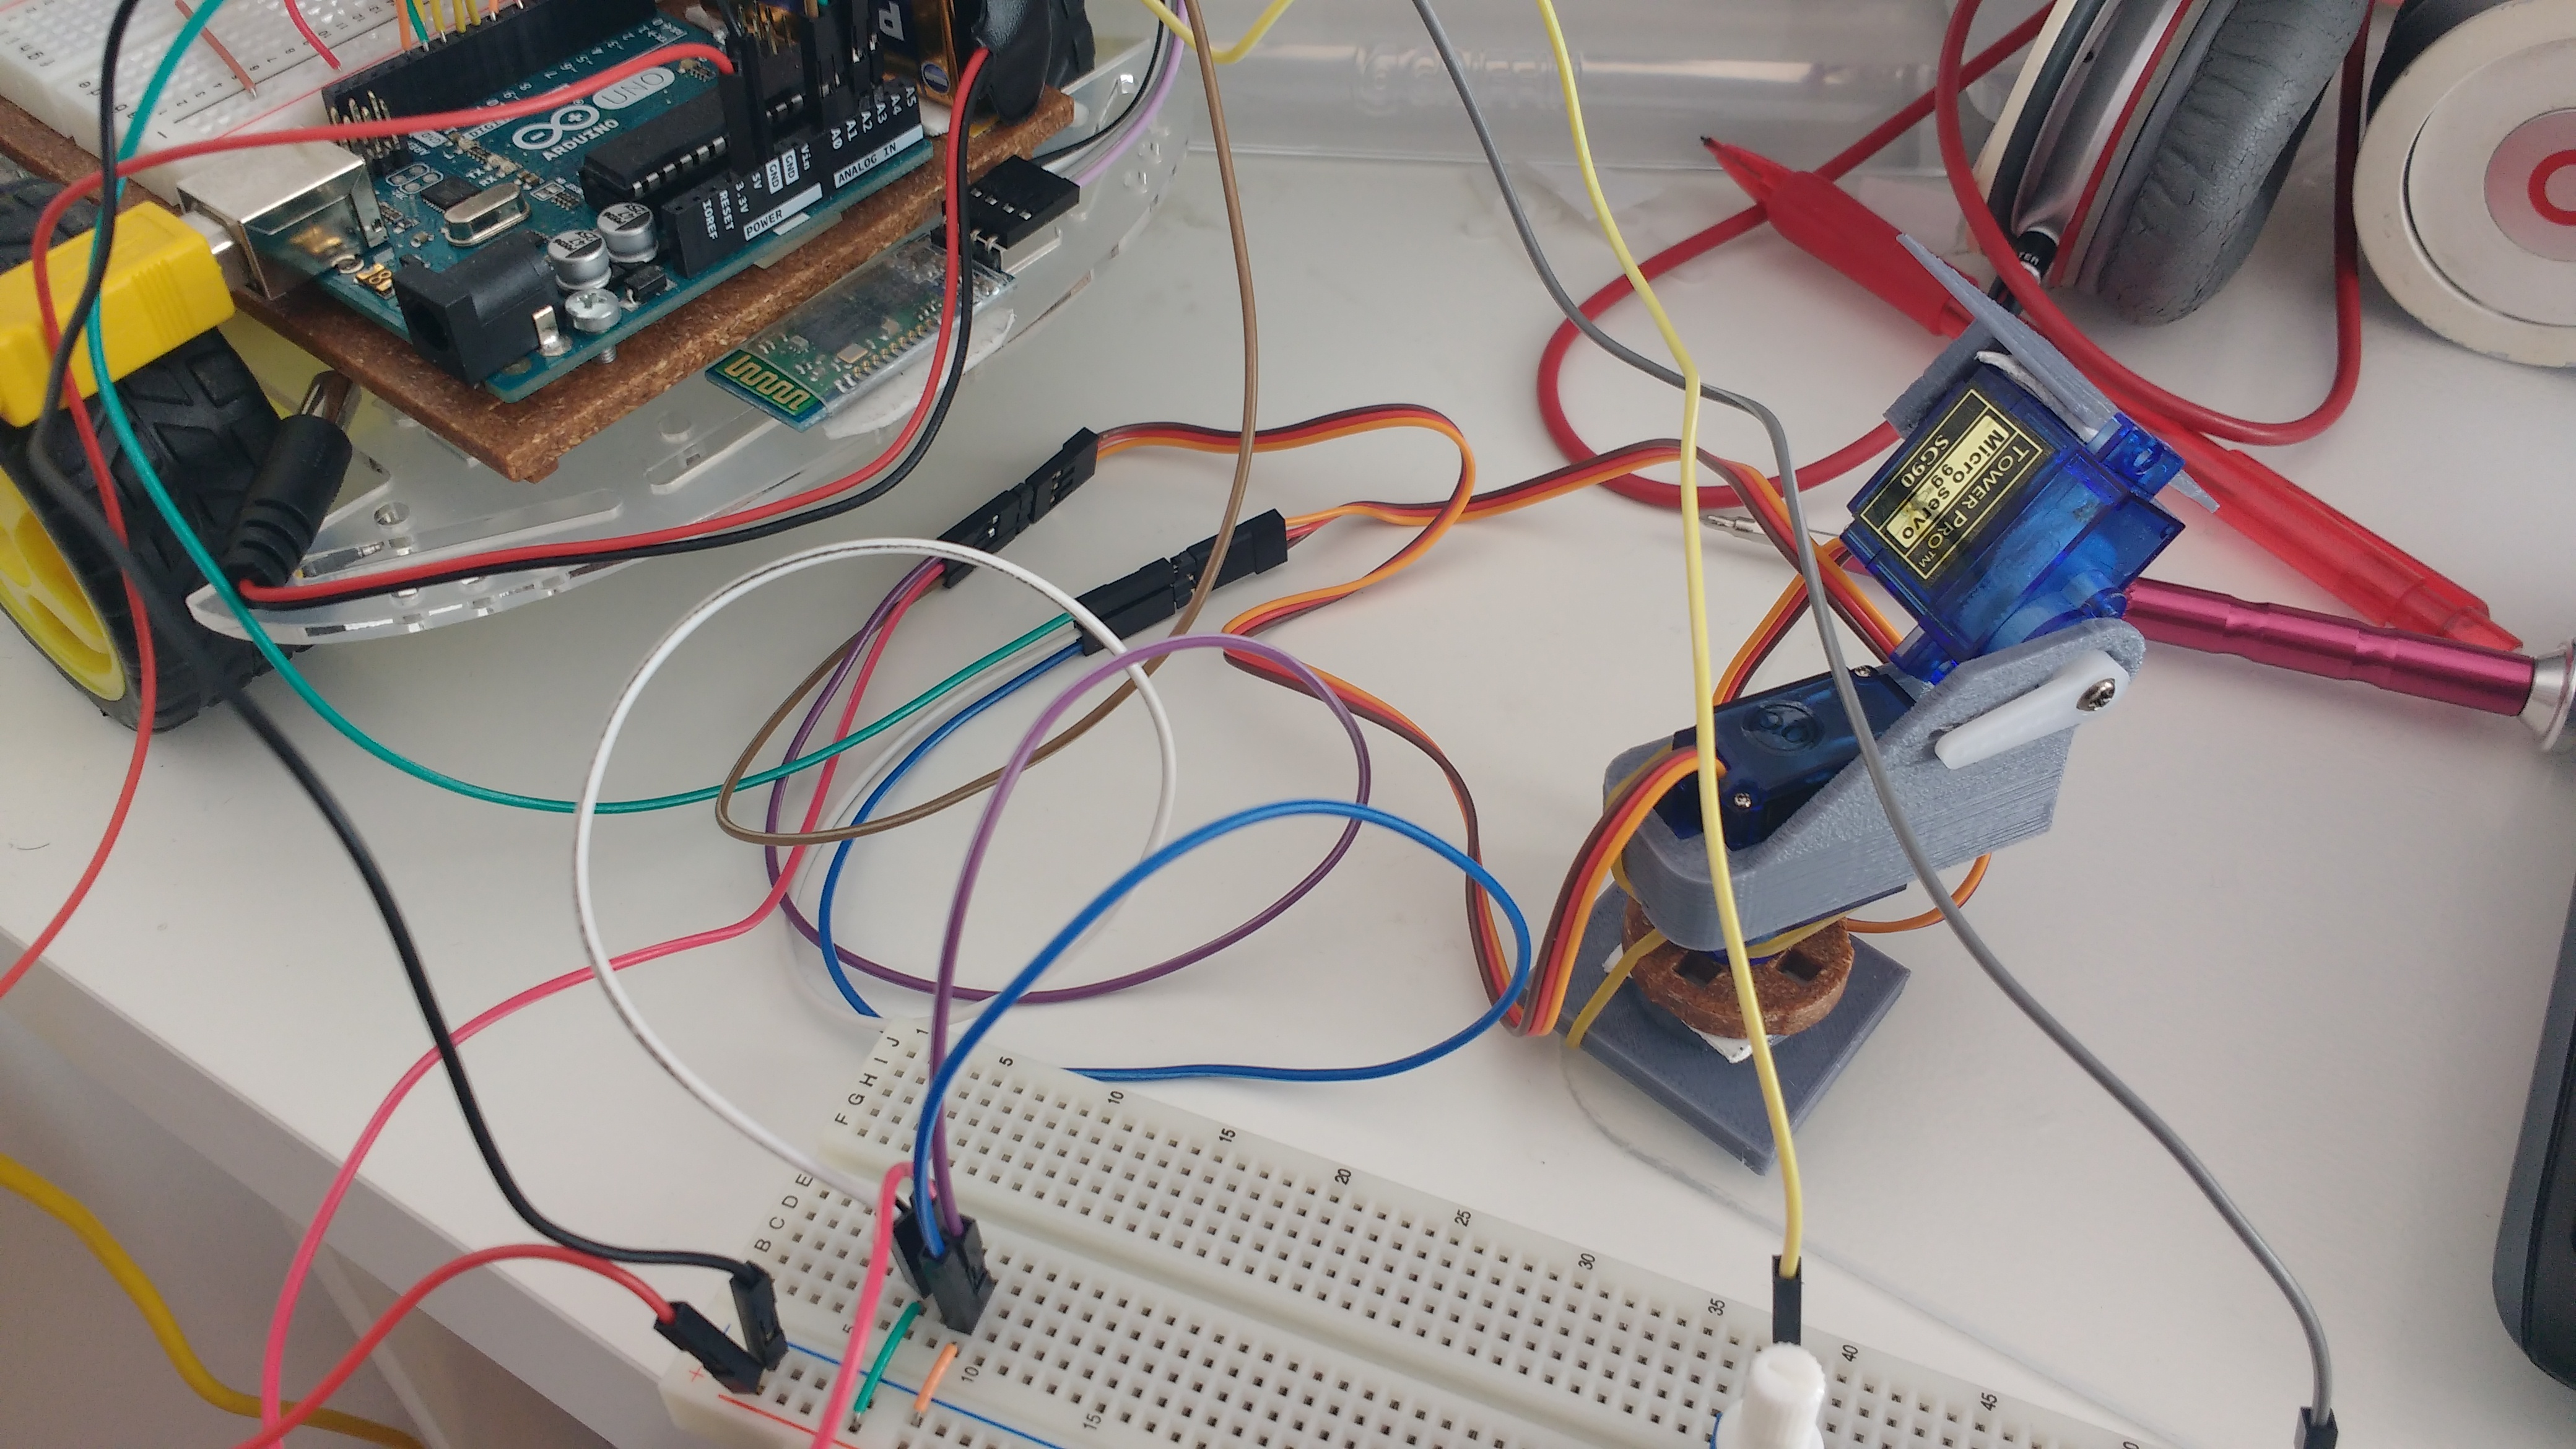
Notice that:
- The red servo wires (power) connect to red and white (the middle wires) which then connect to the Arduino’s Power (+) in line
7of the breadboard. - The brown servo wires (ground) connect to blue and purple, which then connect to the Arduino’s Ground (-) in line
9of the breadboard. - The orange servo wires (I/O) connect to brown and green, which connect to the Arduino’s ANALOG IN
A0ANDA1.
Also, make sure to connect the bottom servo, the one that will rotate horizontally, to A0 and the top servo, the one that will rotate vertically, to A1 so that they make sense with the code below.
Mounting the Servos
In order to mount the horizontal base, you have a couple options:
- Come up with your own plastic/glue/rubber-band hack to mount the vertically rotating servo on top of the horizontally rotating servo.
- Use the Thingiverse Project, where you will have to cut one of the plastic mounts that come with your servo and place it inside of the circular base. You would then put a screw through the bottom hole of the circular base so that the servo is mounted properly. An example of this is in one of the photos of the the thingiverse project.
- (What I did) Use the Thingiverse Project and change a few things. Since I had the Arduino Starter Kit, I had this little wooden piece that is perforated to mount a servo without screws. I didn’t want to cut the plastic mount for the servo, so just taped the wooden piece to the circular base and then inserted the horizontal servo. Because this is not entirely stable, I also wrapped a rubber band around the base so that is would not fall off when turning fast. You can see this setup here:
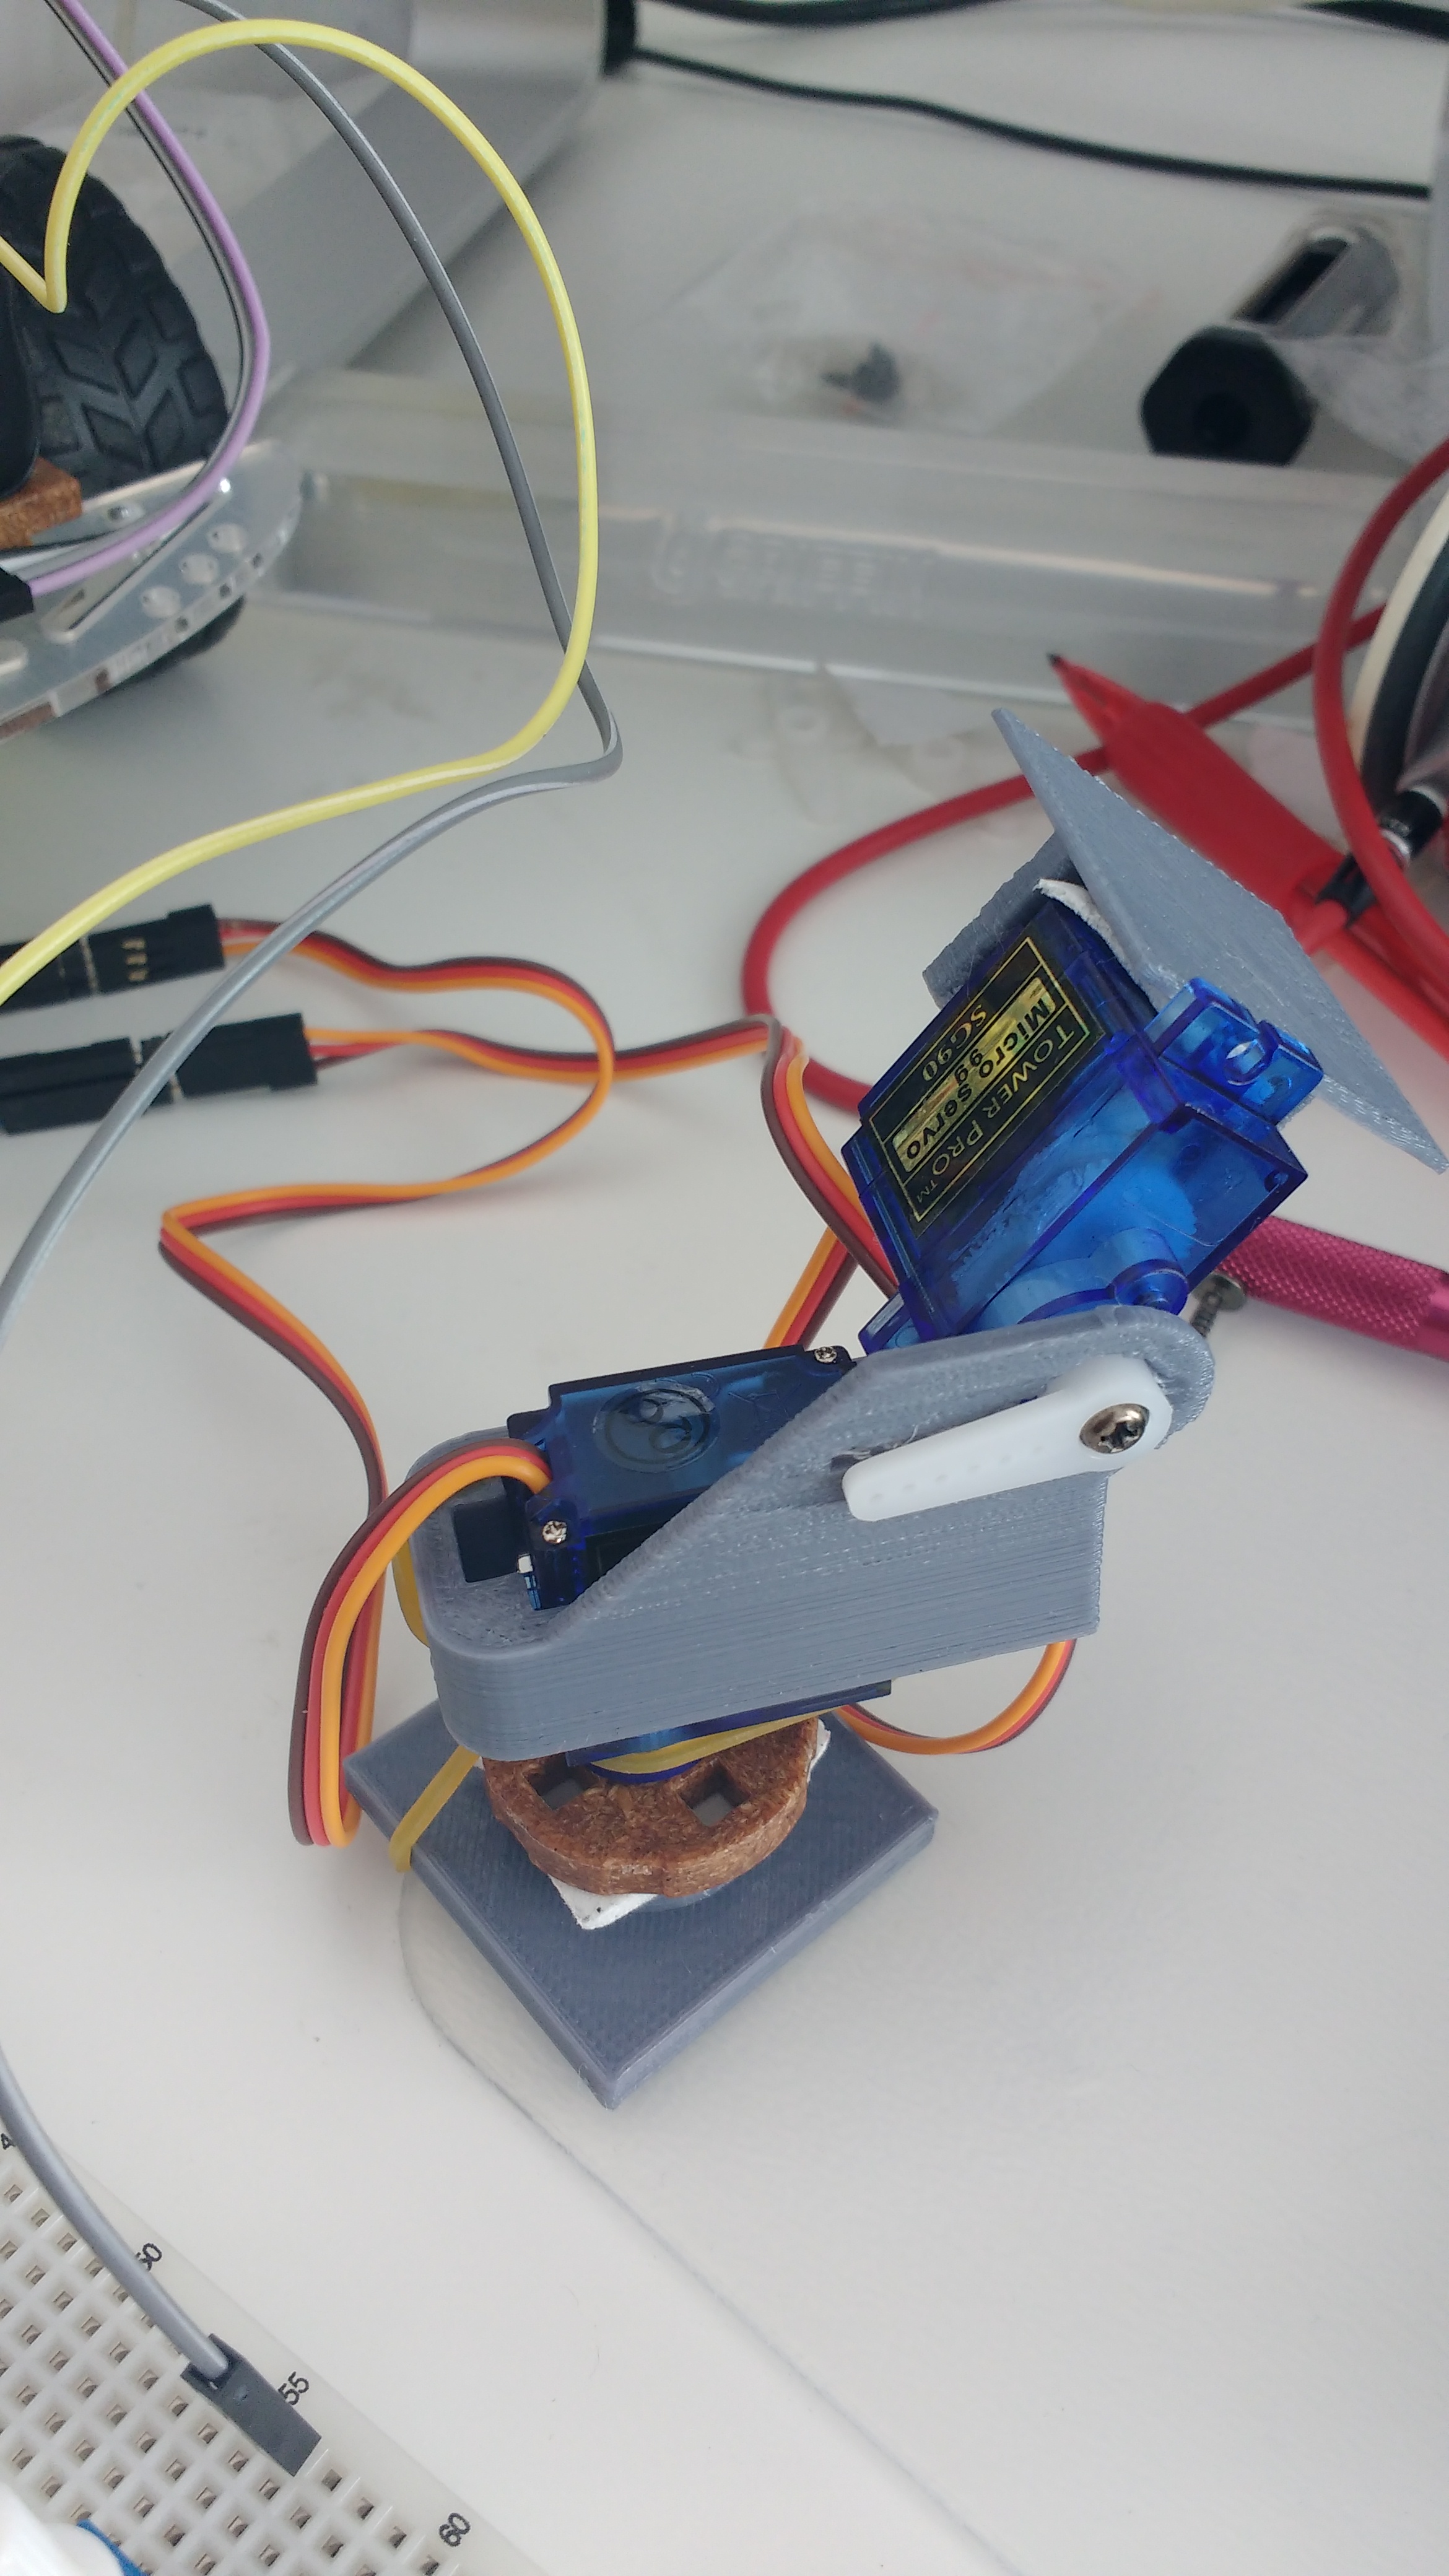
If you like the design and want to use this in your projects, the screw is much more stable. However, I am testing out some different options and just wanted to tape without having to cut and ruin my plastic servo mount.
In case you did 3D print the pan tilt, I had to hack it up a little to get it to work with the spherical rotation. If you look at one of its videos, you will see that it doesn’t rotate 180 degrees vertically: it rotates something more like 90 degrees. To get around this, I taped the top platform to the back of the vertical servo so that the plastic does not hit the horizontal base when rotating in the complete 180 degrees.
Potentiometers
We want to be able to control the movement of the horizontal and vertical servos given some sort of input. A straightforward what of doing this, with a very clear tutorial is using Potentiometers. Mine came with my Arduino Starter Kit, but you can also buy them cheaply online.
Here is what they should look like:
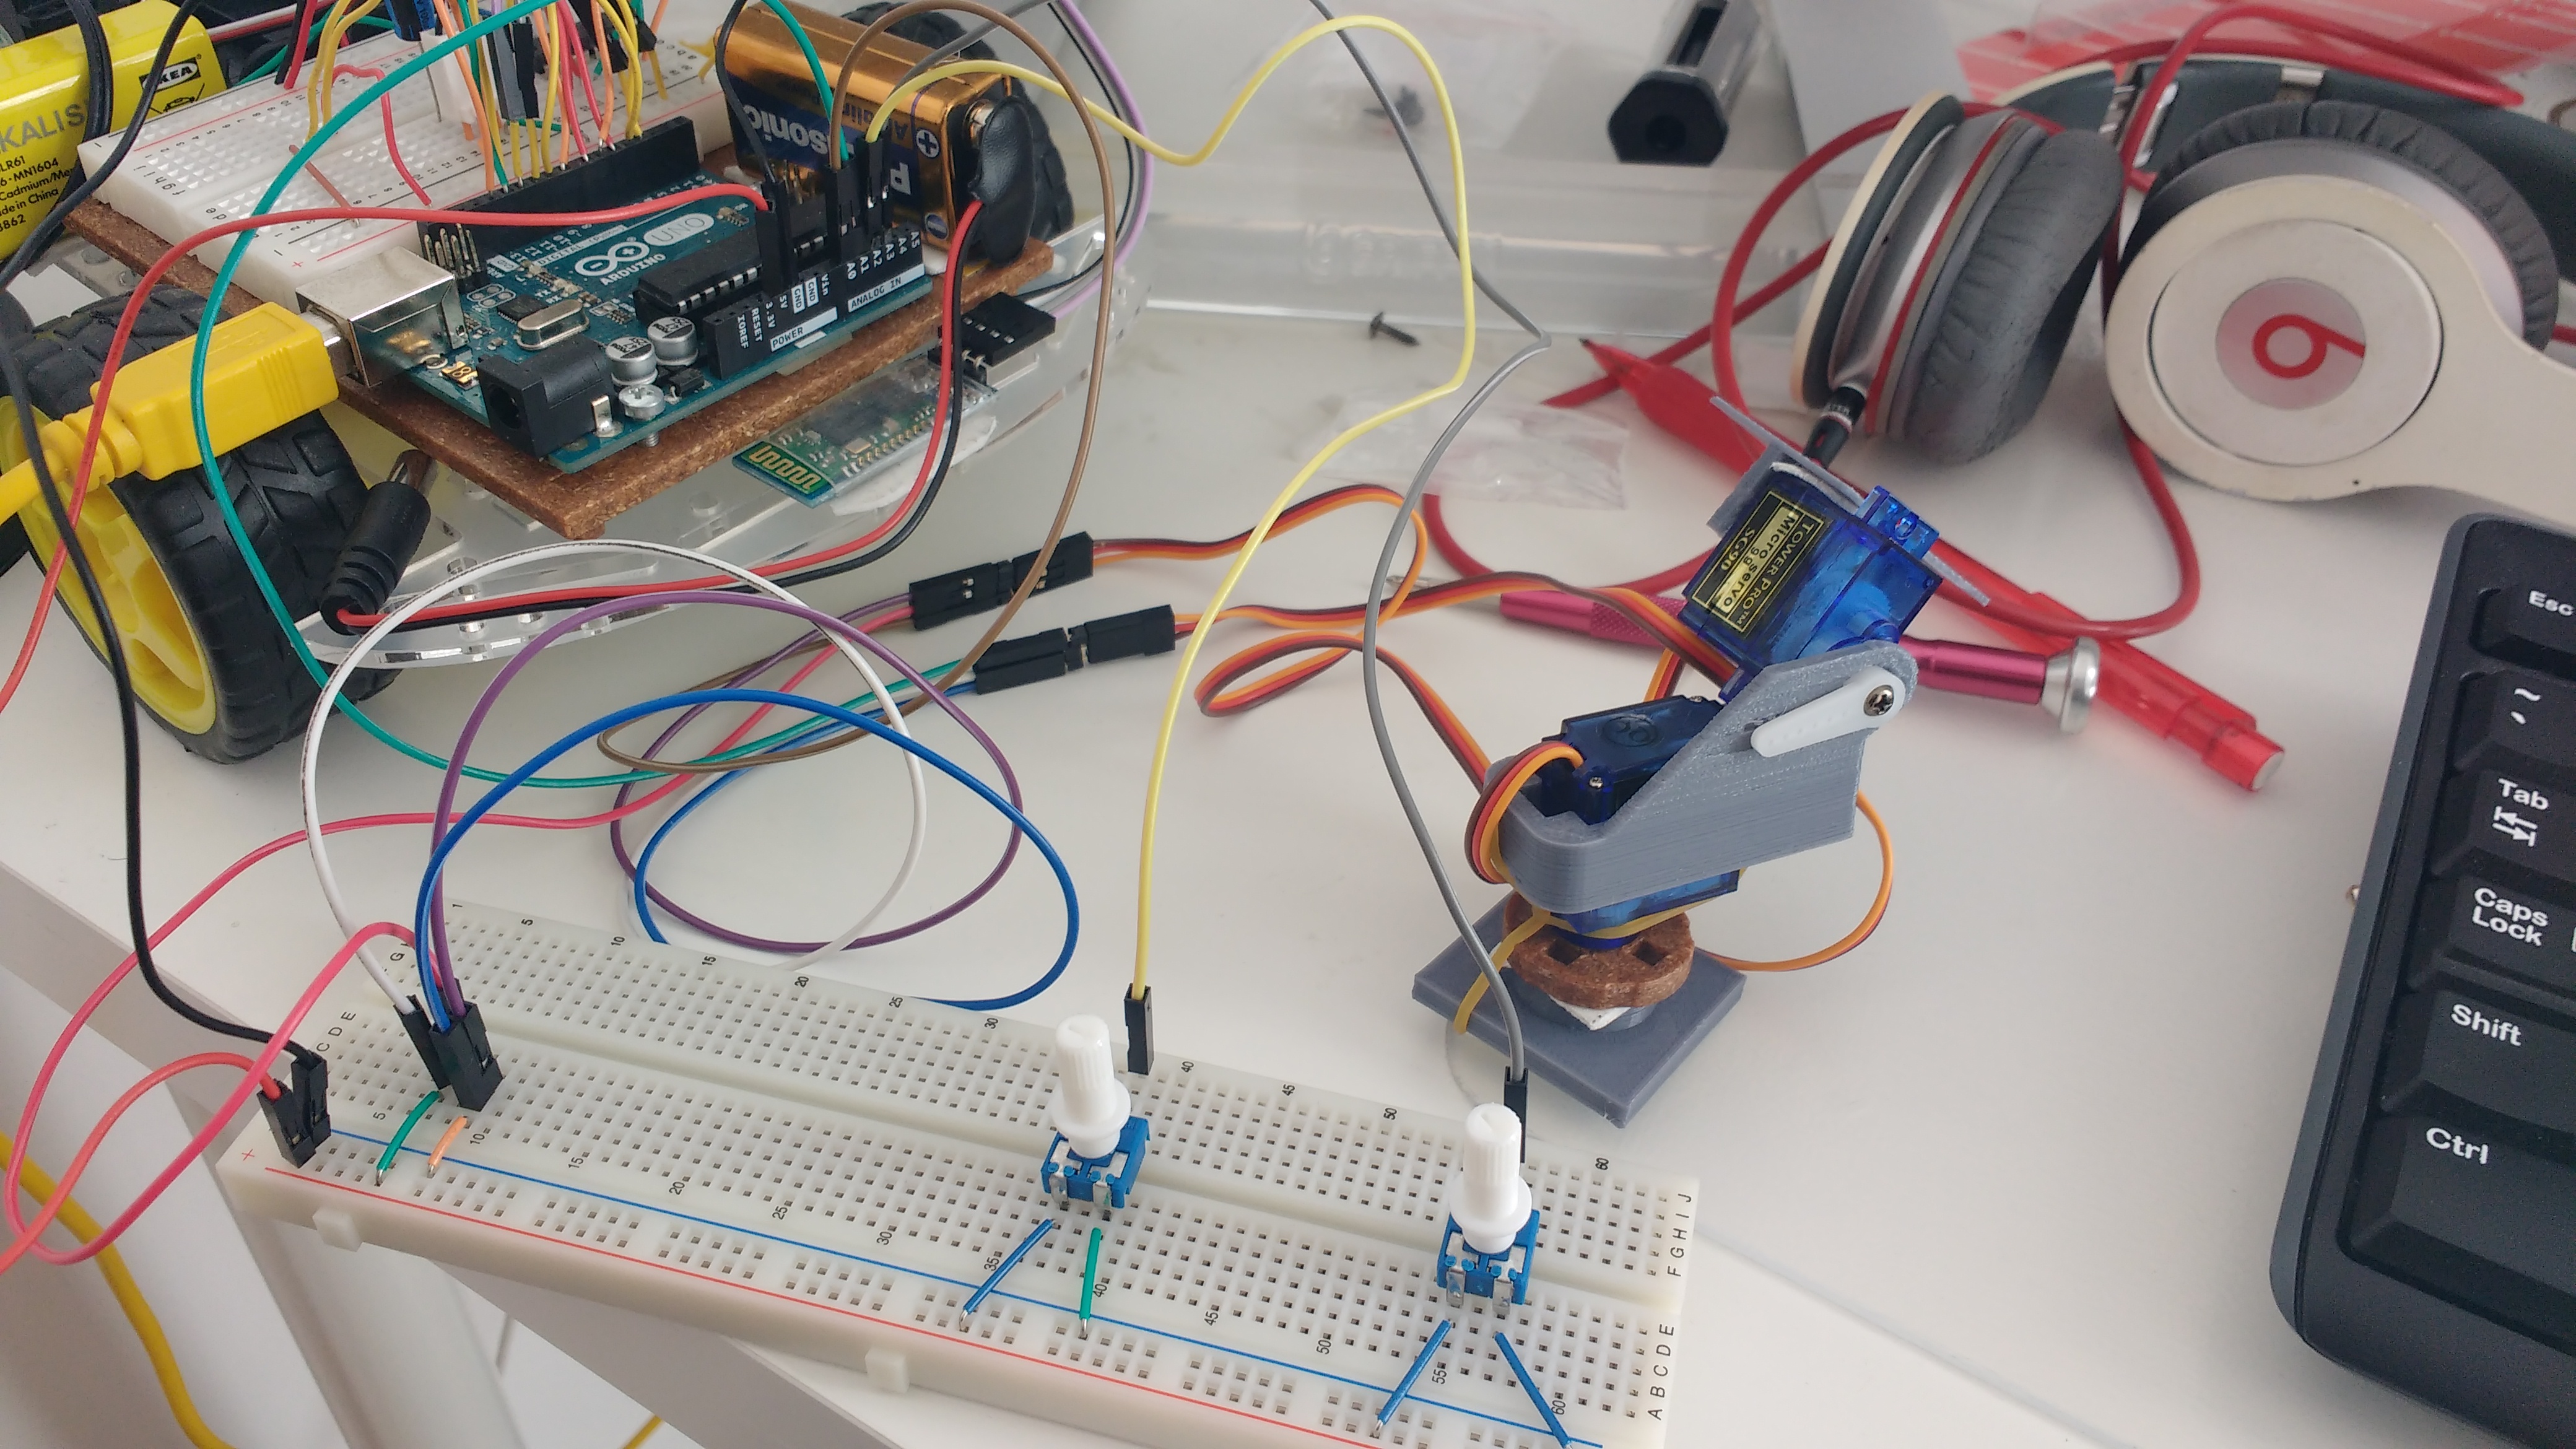
The potentiometer should have 3 pins, one side having 2 pins (the power and ground), and the other side having the control pin. Basically, what it will do is control the ratio of voltage between the control pin and the power. This will then be read by the analog pin and can control the position of the motor via some logic which is in the Code section below.
On the power and ground side, connect the left pin to the power and the right pin to the ground. On the control pin side, connect the control pin to the Arduino’s ANALOG IN A2. This will be the control for the horizontally rotating servo. Repeat this process with another potentiometer, except connect the control pin to the Arduino’s ANALOG IN A3. This will be the control for the vertically rotating servo.
Code
Here is the code that needs to be uploaded to the Arduino. I have tried to heavily comment it and keep the variable names meaningful so it is understandable at a first glance. Feel free to change it however you see fit:
#include <Servo.h>

#define HORIZONTAL_POTENTIOMETER 16 // Analog in A2
#define VERTICAL_POTENTIOMETER 17 // Analog in A3

Servo horizontalServo; Servo verticalServo;
int horizontalPotentiometerValue;
int verticalPotentiometerValue;

void setup() {
  // set the analog in pins for the servos
  horizontalServo.attach(14); // Analog in A0
  verticalServo.attach(15); // Analog in A1

  Serial.begin(19200);
  Serial.println("Ready");
}

void loop() {
  // read the position, or voltage, of the potentiometers
  horizontalPotentiometerValue = analogRead(HORIZONTAL_POTENTIOMETER);
  verticalPotentiometerValue = analogRead(VERTICAL_POTENTIOMETER);

  // given position, or voltage, scale it to a value between 0 and 180 for the servo angle
  horizontalPotentiometerValue = map(horizontalPotentiometerValue, 0, 1023, 0, 180);
  verticalPotentiometerValue = map(verticalPotentiometerValue, 0, 1023, 0, 180);

  // once position is scaled, change position of servos
  horizontalServo.write(horizontalPotentiometerValue);
  verticalServo.write(verticalPotentiometerValue);

  delay(15);
}
Conclusion
So how can this be useful? As you can see in the Thingiverse Project, you could put a sensor on the top platform and have it look around. You could even add a camera or anything else that needs directional control. You could add this on top of a robot, and instead of using the potentiometers to control the direction of the servos, you could attach some sensors and come up with a fancy algorithm that tracks movement, heat, etc. Apart from that, it’s a pretty quick thing to learn, but it feels very rewarding to control the servos with simple potentiometers.